Connect ChatGPT to your AI agent
Bring years of ChatGPT conversation history into your Spawn agent. Three steps, no API access required.
An AI agent is only as useful as the context it can draw on. If you've used ChatGPT for a year or more, you have hundreds of conversations sitting in your account — old projects, half-finished ideas, prompts you'd want a future agent to remember. ChatGPT doesn't expose an API for any of it; even an OpenAI API key only covers your API usage, not chatgpt.com history. The official data export is the only path. Here's the exact flow.
- 01
Open ChatGPT's Data Controls
Sign in to ChatGPT, open Settings, and choose Data Controls in the sidebar. Scroll to the bottom — that's where the export lives.
Open ChatGPT settings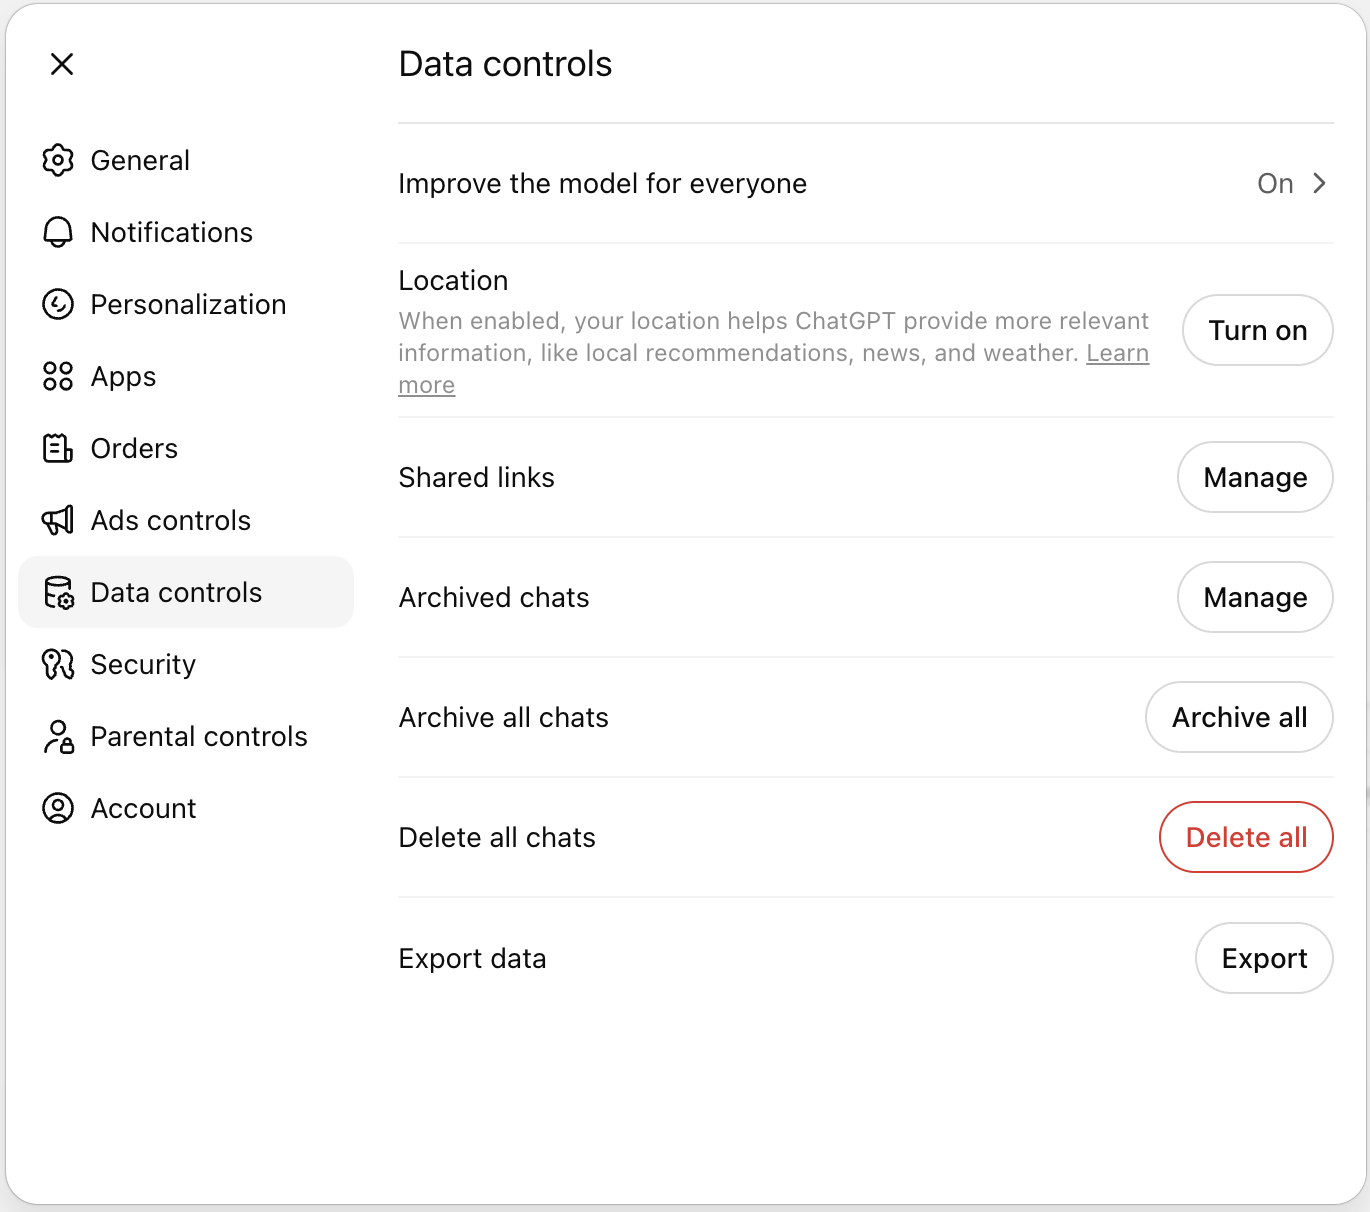
- 02
Click Export and wait for the email
Click the Export button. ChatGPT confirms and sends a download link to the email address on your account. The link usually arrives within a few minutes and is valid for 24 hours.
- 03
Drop the ZIP into Spawn
In Spawn, navigate to Integrations & Data → Data Sources → ChatGPT (full path: spawnlabs.ai/configurations?tab=data&source=chatgpt). Click Import data, drag your ZIP into the drop zone. We unzip the conversations.json mapping tree, reconstruct the linear thread you actually saw (regenerated responses are filtered to the path you took), and index each conversation as its own memory entry under your default agent. Every agent you spawn can search them via search_memory.
Open ChatGPT data source in Spawn
By default, the imported chats live in your default agent's brain at spawnlabs.ai/configurations?tab=data&source=chatgpt — workspace teammates' agents can't see them. From that same page you can grant per-source access to any of your other agents, and remove everything (ZIP, parsed entries, vectors) in a single click.
Frequently asked
Next guide
Ready to put this guide to work?
Spawn an AI agent for the work that eats the most hours. First agent live in under an hour.